kenziepadilla

Top 7 Must-Dos While Hiking to the Bottom of the Grand Canyon

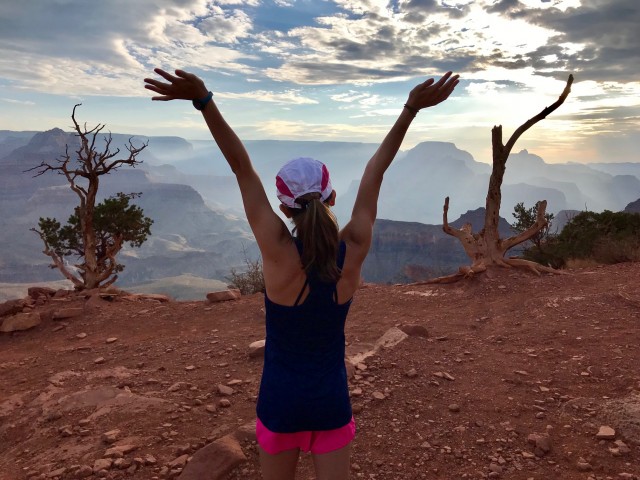
If you’re here, you most likely are hiking to the bottom of the Grand Canyon! My hike to Phantom Ranch last summer was one of the best experiences of my 13 years, even though it was also probably the hardest things I’ve ever done. I’ll always remember how much my feet hurt afterwards, but also the beautiful views and amazing times. So, I’ve decided to write this post to let anyone hiking to the bottom know all of my highlights of our hike, so nobody misses anything that made my experience at the Grand Canyon so great!! (just to let you know – this post won’t tell you any of the essentials you’ll need for your hike – but you can find that out here in my post 5 Tips and Tricks for Your Hike into the Grand Canyon).

Top 7 Must-Dos While Hiking to the Bottom of the Grand Canyon

  1. See the sunrise!

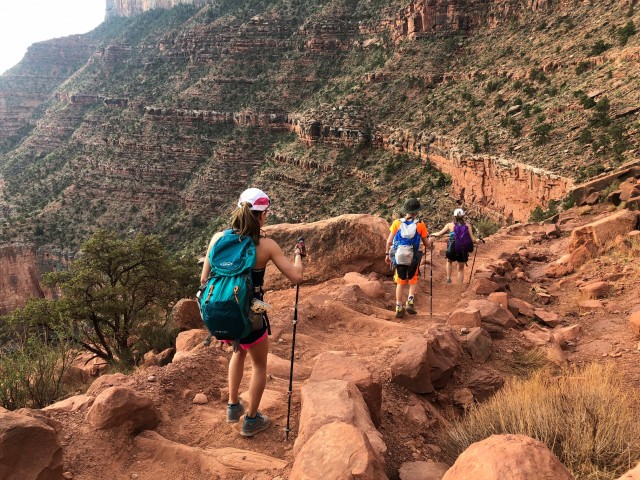
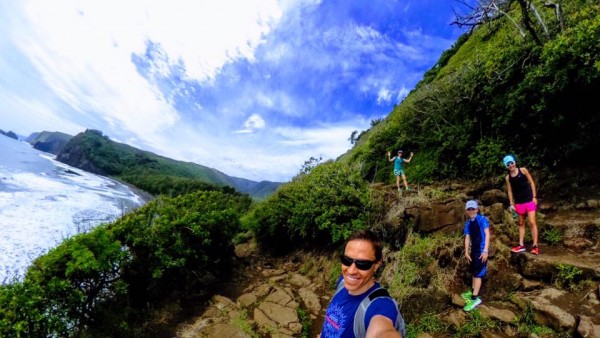
Most likely, if you’re hiking down to the bottom of the Grand Canyon, whether you’re staying at Phantom Ranch or camping, you’ll be leaving pretty early in the morning. When we hiked down last August, we woke up around 4:00 in the morning, to head over from our hotel on the rim to catch our early morning hiker’s bus at 4:30. By the time we got to the head of South Kaibab trail, the sun still wasn’t up. As we started our exciting hike down, the sun began its ascent just as we reached our first view point – Ooh Aah Point. We were able to capture some beautiful pictures, and loved our first view inside the canyon.

2. Dip your hats in the river!

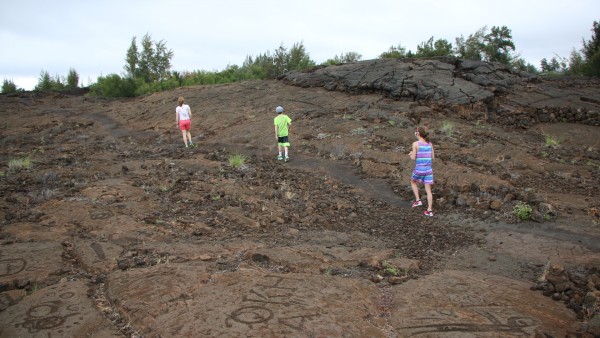
Hiking down South Kaibab Trail, it’s going to get hot. Especially by the time you cross the bridge over the Colorado. So, when you finally reach a branch of the Colorado on your way to your camp site/Phantom Ranch, you’re going to be pretty hot and sweaty. We had the idea to dip our hats into the river, get a scoop of fresh water, and splash it onto our heads. This simple act helped us cool off tremendously and the cool water on our hair felt amazing!

3. Go to a Ranger talk at Phantom Ranch!

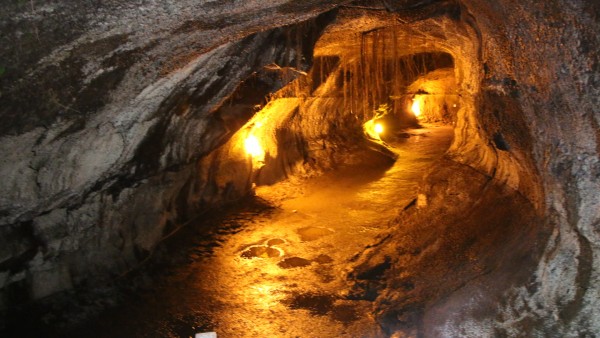
Although the meals at The Canteen in Phantom Ranch are reserved just for people with a cabin reservation, anyone can go to one of the Ranger talks during the day or at night. These talks are super interesting and fun! The ranger will likely talk about the geography of the canyon, or maybe some species that live in it. They also will answer any questions you have about the canyon’s history, geography, or anything else that crosses your mind! It’s also super interesting talking to the rangers, because these people work in the canyon, and have hiked in and out many times, so they’re super experienced and generally cool people all around.

4. Get your Phantom Ranch Junior Ranger Badge

Inside The Canteen (which anyone can go in besides at the meal times), you can find a packet to get your Junior Ranger badge! If you can’t find it, ask one of the workers at The Canteen where you can find one, and they’ll point it out for you. The packet does take some time to complete, but it’s definitely worth it. The questions are all pretty open ended, and there’s not really one right or wrong answer. When you ask a ranger to check your packet to approve it and give you your badge, as long as you seemed excited about the canyon and can list some things you learned/why you loved your experience you’ll definitely get it. Please do NOT be put off by the slightly long packet, because the Phantom Ranch Junior Ranger badge is sooo worth it! It’s a super cool circular patch with a rattle snake on it that says Phantom Rattler and Phantom Ranch Junior Ranger on it.

5. Mail by Mule

Again, in The Canteen, there will be an entire section dedicated to the Mail by Mule! Chances are, on your hike down, you passed some Mule heading up and down (or at least smelt their poop). These mules are used for transportation of tourists into and out of the canyon, as well as transporting supplies and essentials to Phantom Ranch… and to send your Mail by Mule! To do Mail by Mule, all you need to do is pick out some beautiful post cards of the Grand Canyon (which – remember – you will be INSIDE OF!!), write a short note on each one to whomever will be receiving it (I recommend sending one to yourself – you’ll enjoy the memories of your fun vacation when you get home!), address the envelope, and pay for a stamp for your envelopes. If you want, you could also bring your own stamps in your hiking backpack for your envelopes, but DEFINITELY make sure you bring money! (The Canteen takes credit cards and cash)

6. Stargaze outside of your cabin/tent!

The entire Grand Canyon area is really conscientious of their effects on the environment, so they have special lights  that minimize light pollution. This, along with the fact that there won’t be much light on in the middle of the night given your at the bottom of the Grand Canyon, causes the stars to be super bright, beautiful, and AMAZING! We naturally woke up in the middle of the night, but if you don’t have confidence that you’ll wake up after your long hike, you can set an alarm for anywhere between 1:00-3:00 AM to go stargazing. When I say stargazing, I don’t mean anything organized or official. All you need to do is walk out your cabin door to see an entire arm of the Milky Way, and thousands (at least) of magnificent stars shining brighter than you could possibly imagine. This was amazing for me because I am someone who LOVES space and science, especially anything to do with stars, so it was so so so cool to see all these stars in the night sky!

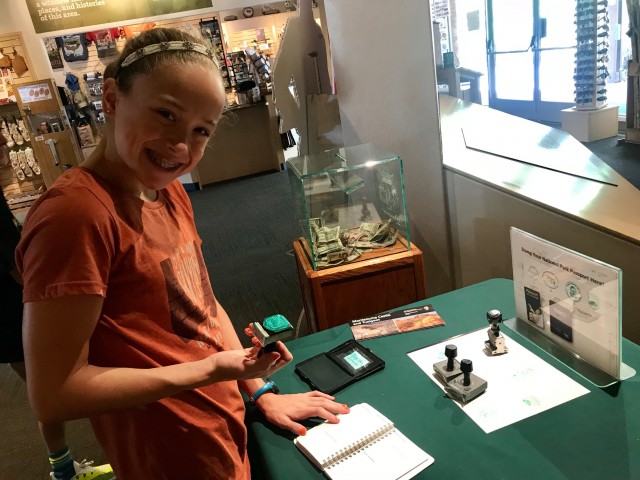
7. National Park Passport Stamp

Your National Park Passport is a book with all of the different regions of the country, and spots to put stamps in from all of your visits to National Parks! It’s so fun collecting the stamps, so if you don’t already have a National Park Passport, I definitely recommend getting one! Now, you might be thinking that you don’t want to buy one of these books (they don’t cost that much) for your one trip to a National Park, but my guess is that you’ll go to another National Park sometime in the future, you probably live close to one too, and there’s a bunch of stamps and national parks you can get/go to in and around the Grand Canyon National Park. (Check out my post Why You Should Get a National Park Passport for Your Trip to the Grand Canyon here)

At Phantom Ranch, if you go to the Ranger Center, you can find the stamps for Phantom Ranch! We had already had our National Park Passports, so we brought them to the Grand Canyon with us and made sure to pack them into our hiking backpacks on our way to the bottom. I definitely think you should get your National Park Passport stamped at Phantom Ranch! (P.S – Did you know that only 1% of the millions of people who visit the Grand Canyon every year make it all the way down to Phantom Ranch?)

Why You Should Get a National Park Passport For Your Trip to the Grand Canyon!

Let me tell you why you should get a National Park Passport. National Park Passports are super cool mini book things that have spaces for stamps you can collect in all of the National Parks across America. When we went to Arizona to visit the Grand Canyon, we flew to Phoenix and then rented a car to drive to the Canyon. Most people know that the Grand Canyon is a National Park, but not many know about the other super cool National Parks surrounding it.

On our way there, we stopped at Montezuma’s Castle, which is a super cool example of the ruins of where the Ancient People lived IN the rocks. You can see the little windows and houses built into the red rock, as well as read all of their signs telling you the history of the tribes that lived in the rocks. When you go to the Visitor’s center, you can get your passport stamped! If you don’t already have a passport from either a National Park that you’ve been to before or one near you, you can buy one there, or on amazon for a little bit more money.

When we got to the Canyon, we explored and found a bunch of places to collect stamps! The stamps are all super cool and vary from stamps of Moose to cool architectural buildings. In the Grand Canyon National Park, you can get your book stamped almost every building, from the visitor’s center to the Kolb Studio to the Yavapai Geological Museum.

During our stay on the rim, we went on the short ride to the Desert View Watchtower. Even if you aren’t interested in getting stamps, I highly recommend this place. It gives you a 360 degree view of the canyon, a new view of the Colorado River, and a super cool look at history. You can get your book stamped here too, and it’s a super cool stamp of the tower!

5 Tips and Tricks for Your Hike into the Grand Canyon

I’m going to tell you 5 tips and tricks for your hike into the Grand Canyon. It’s super hard to go all the way to the bottom of the Grand Canyon, but TOTALLY worth it. Here are 5 of the little-known tricks to make your hike down into the Grand Canyon much more enjoyable!

  1. Salt tablets

These little tablets (although they don’t taste amazing) will definitely help you recharge and reboost for the rest of your hike! You can buy these Salt Stick Fast Chews on Amazon for $4.95 for a four pack of about 10 each! I could tell how much these helped me on my hike. We even saw this one girl on our way up who was really struggling with the heat, so we gave her a few of the tablets and we saw her again at the food court a few hours later!

2. S’well or any water bottle that keeps your water cold

We used these water bottles on our hike to keep our water nice and cold in between rest stops, and they helped so much! The cold water helped to keep us more motivated to hydrate and cool us down. We used Sip by S’well, but any water bottle that isn’t too heavy and keeps your water cold will do!

3. Powerade/Gatorade

We brought one big bottle of Powerade each for our trip down, which was a really nice replenishing drink. once we drank the whole thing, we just used it as an extra water bottle to fill up at the rest stations.

4. FOOD

You can’t have too much food on your hike. We ate a surprising amount and definitely needed it to make it through the hike. I packed something along the lines of pretzels, packs of peanut butter crackers, GoGoSqueeze applesauces, chips, bananas, a Cheerio-Craisin mix in a ziploc bag for breakfast, and a muffin.

5. Take rests!

Although you might be thinking that you just want to get to the bottom, rests will help you so much. A bunch of 5-minute breaks to regroup and hydrate a little will be really beneficial and I also recommend a few longer ones at the lookout points where you can sit down and have a snack. We tended to take small breaks in little shaded areas and bigger ones at the Lookouts. On the way up, we took a long (and much-needed) lunch break at Indian Gardens. After these breaks, you will feel so much better and more prepared to take on the climb!

Goodbye Christopher Robin – Remembering Premiere & Movie! #GoodbyeChristopherRobin

I absolutely LOVED this movie when we went to see it in October! It was so interesting to learn the real story behind the creation of Winnie the Pooh, and the consequences that come with fame.

My mom and I got the opportunity to travel to New York City to celebrate this great film on the red – or should I say green – carpet at the New York Public Library.

greencarpet

We even got to talk to some of the cast members including Will Tilston (Christopher Robin) and Damnhall Gleeson (A.A Milne), who were so nice! We made sure to not take a picture with Will, due to the movie being about how Christopher Robin’s life changes for the worse at such a young age because of the fame of his father’s books. We happily noticed that the cast was definitely more protective of him, as this was his first film at 9-10 years old. It was definitely fun hearing the real British/Scottish accents of the cast!

Original-Winnie-the-Pooh-Toys

The movie was filmed in the REAL 100-acre-woods, where the REAL Christopher Robin would play with Winnie the Pooh and Piglet! Also, to my delight, the REAL Piglet, Pooh, Tigger, Eeyore, Kanga, and the whole crew were on display at the library that day!! I personally think that in the movie Piglet looked bigger than the teacup-sized animal that he is, and I was surprised to see the adorable tiny Piglet, but the actors said that in the movie the Piglet was small as well.

We talked with Damnhall Gleeson for a while, and he was very nice and enjoyed chatting with us about the portrayal of A.A Milne (I would also like to mention that he was the Imperial guy in the Last Jedi, and the “new” Mr. Mcgregor in Peter Rabbit).

domnhall

After talking to the actors and watching the film, we went to a bookstore in search of Winnie the Pooh books, and fond the real book of Winnie The Pooh as well as a book of quotes from A.A Milne shard through Winnie the Pooh’s story. Here are some more pictures:

New-York-Public-Library-600x500kenzie-fancy-600x589Pooh-and-Kenzie-600x450

MUST HAVE A SQUISHMALLOW!!!

OMG I loooove these amazing plush Squishmallows! They are literally the plush, stuffed animal form of marshmallows! I was sick last week, so I was laying around watching TV a lot, and it was so great to hug my huge Squishmallow!

These Squishmallows are super duper soft on the inside and outside, and the adorable faces just tops everything off and makes you want to squeeze these cuddly critters even more!

squishmallows

You can buy these Squishmallows and more at places like Five Below an Walgreens!

Tips for Trading with the Jawas at Disney’s Hollywood Studios!

Ok, so I’m sure you all know Star Wars, and the Jawas that are always popping in the movies. But did you know that you can visit and trade with these Jawas yourself at Hollywood Studios? Just step into the Star Wars Launch Bay and find yourself a Jawa! Now, over the past the year, we’ve traded with multiple Jawas and found some tips of the trade, so we might as well get started:

  1. Grab anything from your junk drawer at home – , discarded toy parts, old trinkets, etc. The Jawas love anything shiny and things that clasp together with magnets! We definitely had more success trading with the Jawas when we brought our random trinkets.
  2. We found that things we thought the Jawas would love they turned down and our random pieces of junk they loved. We traded some great junk for awesome little plastic droid parts and since they put what you trade them into their goody sack, there’s a chance you could even get what someone else traded.
  3. Jawas definitely like rare objects found off the beaten path, so they don’t usually accept theme park maps or tickets, as they are fairly common.
  4. As a general rule, Jawas DO NOT accept money or food/drinks.
  5. Although the Jawas like random objects, they don’t seem to like trash.
  6. We haven’t tried this yet, but it is said that you may be able to trade one of your Disney pins for another pin.

After you trade with the Jawas, be sure to explore the rest of the rest of the launch bay, you might run into some Stormtrooopers and artifacts from Star Wars.

bb8

chewielaunchbay

Toothsome Chocolate Emporium! #universalmoments

I absolutely LOVE the Toothsome Chocolate Emporium at Universal, Orlando! At the Toothsome Chocolate Emporium, candy shop meets sit-down restaurant meets an amazing theme park experience! From the delectable desserts to the shop full of interesting candies to meeting Penelope Toothsome herself, the Toothsome Chocolate Emporium will NOT let you down. I honestly cannot decide what my favorite part was, although I think I could give it to the AMAZING desserts.My mom and I shared the “Brookie,” which is a brownie cookie topped with ice cream!! Toothsome Chocolate Emporium is definitely a must do at Universal!

toothsomedessert

Top 5 Must-Dos on The Big Island!! #lethawaiihappen @gohawaii

I may be bias because I’ve only been to Hawaii once, and that was on the Big Island, but I think that the Big Island is the best island of Hawaii. The reason I think this is because it wasn’t the usual tourist-y place you would expect of Hawaii. Instead, it was more of an adventure all around, and you got to interact with the locals. Here is a list of my top ten must-dos if you visit the Big Island of Hawaii:

  1. Pololu Valley hike – This was an absolutely STUNNING hike down a steep trail built into a cliff. It took us about 30 minutes to go down and about 15 minutes coming back up, but believe me, it was worth it. at the bottom, we were met with a 100% black-sand beach, a beautiful blue ocean (which we believe we saw a whale in), and the view of two majestic waterfalls to the right.
  2. Ride The Rim – This is a guided tour on ATVs to the rim Waipio Valley, where we stopped and took a lunch break, looking down at two beautiful waterfalls and a local farming village. You can ride an ATV alone, with a friend, or have one of the employees drive you in a four-person buggy.
  3. Petroglyphs – Take a hike on one of many petroglyph trails and visit the ancient Hawaiian’s drawings.petroglyphhike
  4. Chill out and go to a beach – Snorkel or even walk along the shore, and you may be visited by adorable sea turtles.
  5. Volcanoes National Park – DEFINITELY pay a visit to the volcanoes of Hawaii. I suggest setting a whole day aside for this, so you can visit the volcanoes, hike down the Kilauea Iki crater, explore and visit the lava tubes and arches, come back to the volcanoes at night time to see the glowing lava.lavatube

*also a MUST-do: eat LILIKOI (passion fruit) shave-ice or juice!*shaveice1