The post Merry Christmas! appeared first on One Kid's Life.
]]> ) Thank you Santa so much! I love it. That was by far the best present this year. Another thing I got was this awesome book with quizes in it about random fun facts, like how many matches can the the bigest tree in the world make? over 5,00, over 5 million, or over 5 billion?It was 5 BILLION!!! But instead of just having the answer on the next page or something, Next to each answer there’s a little golden box, kind of like those lottery things that you can do. There’s a little red chip too to scratch off the golden stuff above the box to find out the answer. Another cool thing about it is that its not always just checks or x’s to show if you’re wrong or right. Some of the things that they have besides the checks and x’s are smiley and frowny faces and thumbs up and down. I love this and these are PERFECT for swim meets!
The post Merry Christmas! appeared first on One Kid's Life.
]]>The post 5 Easy Steps to Make Washi Tape Binder Clip Craft for Your Assignment Book appeared first on One Kid's Life.
]]>- go to a store like staples and buy some clips to keep your place if you dont already have any
- buy some washi tape in whatever patterns you want
- cut the washi tape about as long as the clip and roll it over the white or black part
- cut off extra tape
- clip it in your book!!!
Have fun!
![]()
The post 5 Easy Steps to Make Washi Tape Binder Clip Craft for Your Assignment Book appeared first on One Kid's Life.
]]>The post My Square 1 art silhouette!! appeared first on One Kid's Life.
]]>The post My Square 1 art silhouette!! appeared first on One Kid's Life.
]]>The post How to Make Dirt Pudding dessert appeared first on One Kid's Life.
]]>- Glutino Oreos
- Pudding
- Robin Eggs ( if you want this to be G-F, get Cadberry mini eggs)
- a couple fake flowers
- gummy worms if you want
- Easter-colored Peeps
- scissors
Here’s how you make it:
- First, get the Oreos and separate the two cookies stuck together and scrape the white stuff off with a knife
- Then, put them in a Ziploc baggie and crush them with a wooden spoon
- Next, open up a pudding container
- After that, pour about 2 spoonfuls of (with a normal spoon) the crushed up Oreos into the pudding
- Now, cut off a small flower and stem and stick in the pudding and Oreos
- And then, get one of your egg candies and put it next to the flower.
- If you want to, stick in a gummy worm or peep in the pudding too.
- And finally, EAT!!
Have fun and I hope it tastes great!!
The post How to Make Dirt Pudding dessert appeared first on One Kid's Life.
]]>The post Easter Bunny marshmallow craft appeared first on One Kid's Life.
]]>- construction paper
- 1 bottle of Elmer’s glue
- About 50- 100 marshmallows
- googly eyes
- pink pom-poms
- a pencil
- scissors
( if you want to have whiskers, you’ll need a white crayon or white yarn to glue next to the nose)
Once you have all that stuff, here’s what you’ll need to do:
- First,draw a bunny on a sheet of Easter colored construction paper and cut it out
- Next, trace it with a pencil
- Then, Get the glue and squeeze some glue out along the lines of your bunny.
- Now, stick your marshmallows in a row, close together on the glue outlining your bunny.
- After that, glue two googly eyes onto your bunny.
- And then your going to glue on your pink pom-pom under the eyes for a nose.
- Finally, find a good place to put your craft!!
Have fun!! 
The post Easter Bunny marshmallow craft appeared first on One Kid's Life.
]]>The post St. Patty’s Day Rainbow Chain Pot of Gold Craft! appeared first on One Kid's Life.
]]>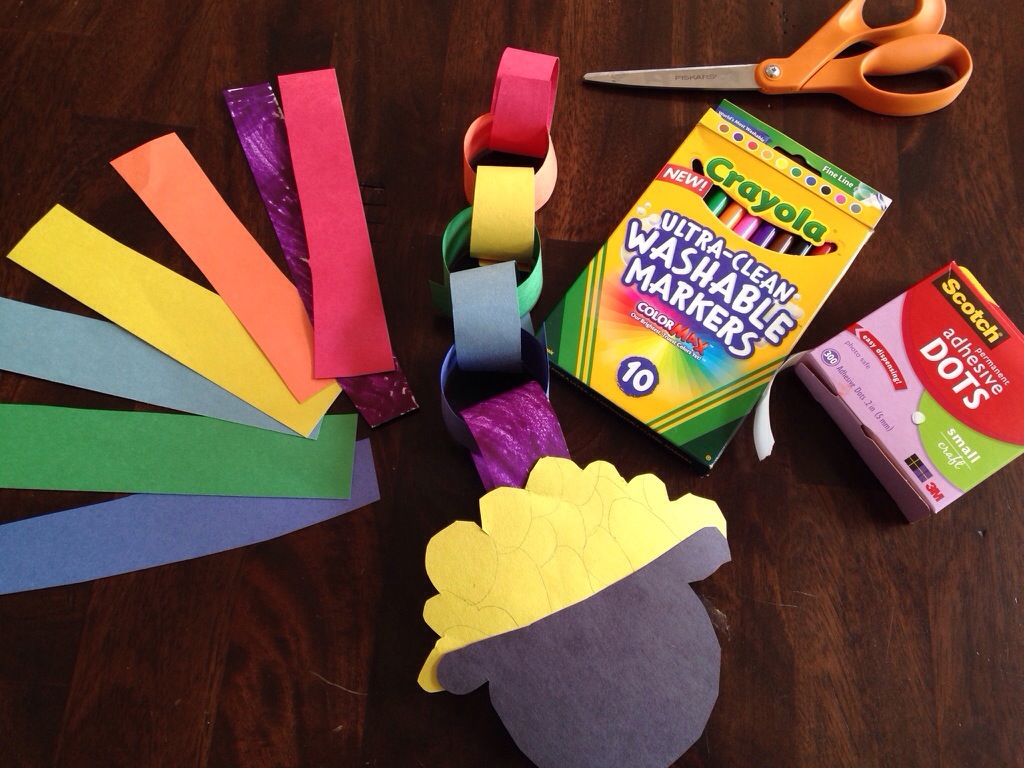
Here’s what you’ll need:
- Construction paper of all the colors of the rainbow and black
- scissors
- one box of Scotch tape glue dots, or glue or tape
- one pencil
Once you get all the supplies, here’s what you should do:
- first, draw rectangles that are pretty skinny, and all about the same size on the construction paper the colors of the rainbow.
- next, cut them all out.
- then, get the red construction paper and glue/tape it to make a loop or circle.
- after that, get the orange piece of paper and loop it around the red loop and glue or tape it to make another loop.
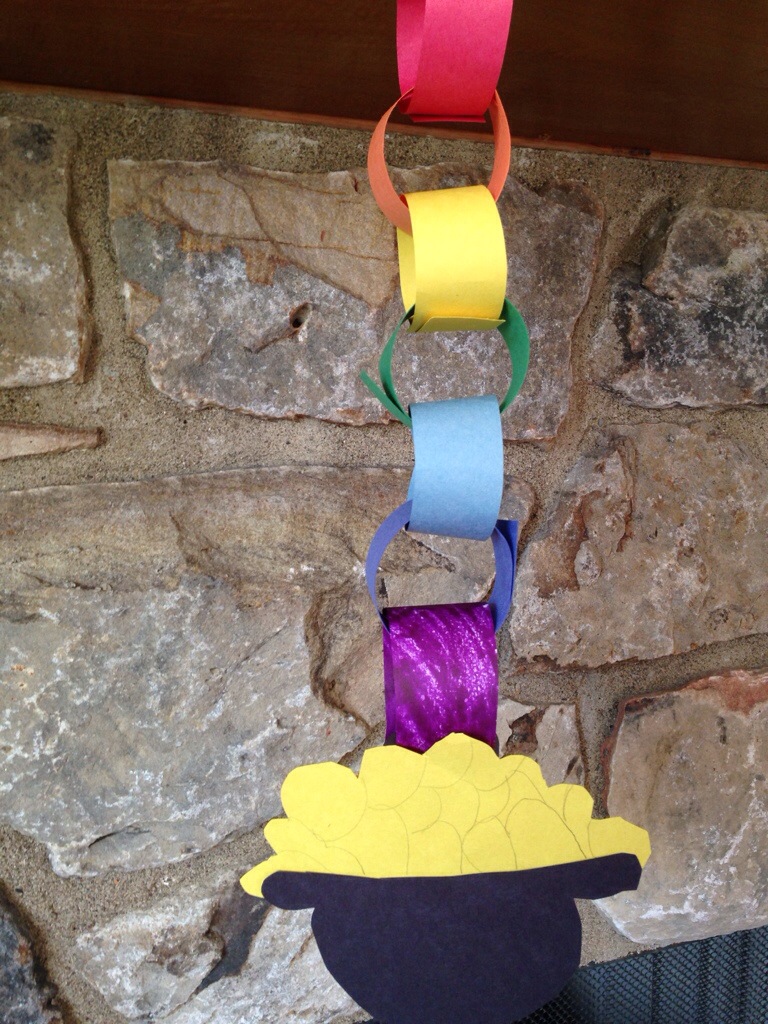
- continue doing that with all of the colors in rainbow order. ( ROY G BIV )
- once your done, draw a pot with your pencil on the black piece of paper and cut it out.
- then, draw a cloudish shape with a flat bottom about the size of your pot on the yellow piece of paper and cut it out. This is your gold.
- next, get about 5 -8 glue dots and stick them to the bottom of the FRONT side of the gold and stick the gold to the top back of your hat.
- After that, cut out a small strip of yellow paper and fold it in half.
- glue dot the bottom of the folded yellow strip to the back of the gold.
- then cut out another yellow strip that’s pretty small and get a peice of normal scotch tape and put half of the tape on the bottom of the strip and stick it to the glued half of the folded paper. Do the same for the top.
- Now, get another glue dot and stick it to the bottom of your chain and stick the chain to the top of the yellow folded paper.
- Finally, find a place to hang up your rainbow!!
The post St. Patty’s Day Rainbow Chain Pot of Gold Craft! appeared first on One Kid's Life.
]]>